How to Clean a Blender
A blender is a handy, multipurpose kitchen appliance found in both commercial and domestic kitchens alike. They can be used for a wide variety of tasks and can save time when prepping meals. Like all kitchen appliances, it’s vital that blenders are cleaned properly in order to maintain good hygiene standards, reduce risk of contamination and ensure the appliance’s longevity. Improper and infrequent cleaning can increase the risk of harm for unsuspecting consumers. In this article we explore why regular cleaning of a blender is important and provide you with guidance on how to properly clean a blender.

Why is Cleaning a Blender Important?
As with all kitchen appliances, regular cleaning of a blender is incredibly important. Regular cleaning helps to ensure that your blender stays clean and hygiene, reducing the risk of bacterial build-up that can cause foodborne illness and food poisoning. An unclean blender also increases the risk of cross contamination which can have deadly consequences. In August 2023, 12-year old Mia St Hilaire died after drinking a milkshake that had been contaminated by hazelnuts and almonds, ingredients to which she was severely allergic. The milkshake was prepared in a blender that had not been cleaned and contained traces of allergens from a previous order made in the same machine.
The cafe that prepared the drink was fined £18,000 and its proprietor given 100 hours of community service after admitting to six criminal charges related to the Food Safety Act. Mia’s death was completely avoidable and had the blender been cleaned properly, or an alternative blender for orders for those with allergies been used, she would still be alive today. Mia’s case may seem like an extreme consequence of an unclean blender, but poor hygiene standards exponentially increase the chances of cross contamination and something as seemingly simple as not cleaning a blender properly, can have catastrophic consequences.
As well as increasing the risk of contamination, an unclean blender can also negatively impact the taste of any food being prepared. For example, if you used a blender to make a marinade and then only give it a quick rinse before making a smoothie, that smoothie is probably going to taste very different to how you intended. Moreover, food build-up can negatively affect the performance of a blender. If the blades become caked in dirt and grease then they will not be able to blend food as well, causing them to use more energy and potentially burn out. Regular cleaning can help a blender to run more efficiently as it isn’t having to work as hard to counteract the effects of food residue.
Finally, for commercial kitchens, maintaining good hygiene practices is a key part of achieving a level 5 rating. During a food hygiene inspection a visiting EHO will want to see evidence that you have adequate cleaning practices in place and that all appliances are regularly cleaned. Should they visit and see a dirty blender being used again and again without being cleaned, or a lack of evidence that regular cleaning is conducted, this is highly likely to negatively impact your score.
Want to Learn More?
Ensuring that kitchen appliances are clean and free from traces of allergens is a key part of allergen management. Learn more about food allergies and how to manage them with our Food Allergen Awareness Training. Our course teaches you about food hypersensitivities and allergens and how to comply with the UK’s allergen laws.
How to Clean a Blender
Blenders come in all different shapes and sizes and can vary greatly from model to model. Nevertheless, most blenders can be cleaned in a similar fashion or have components which can be cleaned in the same way. Below you will find guidance on how to wash the different components of a blender. However, before cleaning your blender it’s vital that you read the manufacturer’s instructions for your model to check whether there is a specific cleaning method you should follow or products you should avoid. When cleaning a blender it’s important that you don’t use harsh, non-food safe chemicals as this can introduce chemical hazards which can cause dangerous contamination.
It’s also important that you ensure all parts are properly dry before reassembling and using the blender as moisture can encourage bacteria growth and damage the electrical components. Finally, blenders can come with either glass jugs or plastic jugs. Deciding which is best for you is down to personal preference as they both have their pros and cons. Glass jugs are heavier and more fragile, but are less likely to discolour over time or retain food smells. Comparatively, plastic jugs are lighter and better at blending large batches, however they can absorb odours and develop scratches and discoloration over time. The material of your blender may impact how you clean it, so double check the manufacturer’s instructions to be sure.

How to Clean a Blender Base
Blender bases tend to house the main electrical component of a blender so it’s important that you never fully submerge the base in water. To clean a blender base:
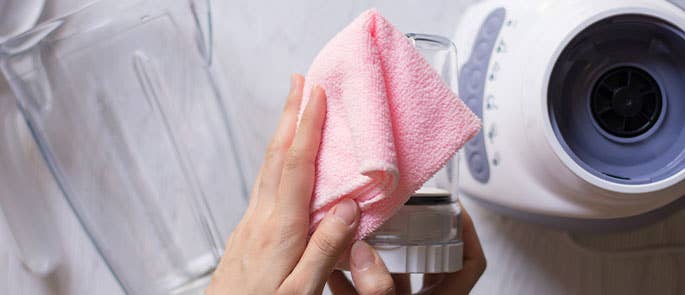
- Unplug the blender and wipe it clean with a damp cloth or sponge. It’s a good idea to give the cord a wipe down as well at the same time.
- Once clean, wipe the base dry with a soft cloth or paper towel.
How to Clean Blender Blades
Blender blades are very sharp so caution should be exercised at all times when cleaning them. Blender blades tend to be housed within the jug or lid of a blender and often can’t be separated. If they can be removed, then they can be washed using warm water and soap or put in the dishwasher if appropriate. To clean blender blades that are fixed to the jug/lid:
- Fill the jug with warm water and add a few drops of washing up liquid. It’s important not to overfill the jug so aim to only fill it about half way.
- Reattach the jug to the blender, turn it on and run it for about 5 – 10 seconds. If your blender has a ‘pulse’ setting it’s advisable to use this for better controlled ‘bursts.’
- Empty the jug and rinse off any soapy residue with water.
- If the blades still look dirty, repeat the process until clean.
Some blender blades can be put into the dishwasher although it is not advised. Check the manufacturer’s instructions first to see if this applies to your model and wash accordingly.
How to Clean a Blender Rubber Ring (Gasket)
Some blenders have rubber rings, also known as gaskets, that act as a seal and stop food from splattering out. To clean a blender gasket:
- Carefully remove the gasket. You may need to use tweezers or a dull knife to get leverage and remove it. Remember to check the manufacturer’s instructions first to see if there is a specific way to remove it or if it’s advised that you keep it in.
- Wash in warm soapy water, using a sponge to scrub the entirety of the ring.
- If there is stuck on residue then leave the gasket to soak in warm soapy water for a few minutes first.
- Once clean, rinse well and leave to dry thoroughly before reattaching.
How to Clean a Blender Bottle
You can clean a blender bottle in the same way as you would the blades. Check the manufacturer’s instructions to ensure whether the bottle can be put in the dishwasher or not. To clean a blender bottle:
- Fill the bottle with warm water and add a few drops of washing up liquid.
- Turn on the blender and blend for about 5 – 10 seconds.
- Empty the bottle and rinse thoroughly with warm water.
- If residue remains then repeat the process or soak the bottle in warm soapy water for 10 minutes.
As mentioned above, plastic bottles are more likely to retain food odours and to discolour over time so you may find that further cleaning is necessary. If this is the case, wash the bottle by hand, being mindful of the blades if still attached and scrub the bottle with a sponge or brush till clean.
How Often Should You Clean a Blender?
You should clean a blender jug, bottle, lid and blades after every use. The quicker you clean these components the less likely they are to develop build-up, ensuring that the blender remains hygienic and energy efficient. The regularity with which you clean the base and gasket can vary depending on the frequency of use and setting. For example, for those working in a commercial kitchen, cleaning every part of the blender should be part of your regular cleaning routine to avoid cross contamination and the spread of harmful bacteria. In a domestic kitchen where a blender may not be used as frequently, you may choose to clean the gasket and the base every few weeks or as and when necessary.

Can You Put a Blender in the Dishwasher?
Most blender components can be put into the dishwasher such as the jug, bottle, lid or blades. It’s important that you check the manufacturer’s instructions first to see whether your particular model can be put in the dishwasher. If your blender can be put in the dishwasher you should separate all components where possible to ensure that each section is washed thoroughly. For example, putting a blender jug in the dishwasher with the lid on is redundant as water will not be able to enter and clean the jug.
You should never put the base of a blender in the dishwasher. This is because it contains the main electrical components of a blender and the water from the dishwasher will damage these parts.
It’s worth noting that whilst some blender blades can be put in the dishwasher many major brands advise against it. This is because the heat from a dishwasher can cause the blades to wear quickly, causing damage to the blades which can then cause them to become blunt. As such, it’s advisable to carefully hand wash the blades or follow the method detailed above.
Blenders are convenient kitchen appliances with many different uses. Effective and rigorous cleaning is necessary to avoid cross contamination, reduce the risk of food poisoning and preserve the flavour of food. Regular cleaning can also help to preserve the longevity of a blender, keeping it clean and efficient for many years to come.
Further Resources:
- Food Hygiene Courses
- How to Clean an Air Fryer
- How to Clean a Kitchen
- How to Clean an Oven
- How to Clean a Microwave
- How to Clean a Fridge
- How to Clean a Dishwasher


